My daughter just turned 2 and we threw her an Elmo birthday party!! She loves that little guy!;-) Anyways, I wanted to share with you the crafty side! If you saw my previous post, you already got a sneak peak with the birthday hat
here.
I don't have any more tutorials for you, but thought I would share some pictures and tips to help inspire some creativity! After all, that's one reason I started this little blog in the first place! More on that
here.
First up...her birthday banner!


It was fairly easy, just a little time consuming with all the cutting! I purchased pre-cut letters in the teacher aisle of Joann's and a pack of scrapbook/card stock paper:

I traced a roll of ribbon to make my circles and free-handed a flower shape and used it as a template for the rest of the flower backgrounds. So once I had everything cut out, I played around with the patterns and colors until I got it just right! Then I glued it all together. Last, I punched holes on each side of the flowers and tied together with thin ribbon. One thing I would do differently would be to glue the circles and flowers together, but wait until after the punching and tying to glue the letters on. I had to peel a couple of mine off and re-glue because they weren't lined up quit right.
In the corner, next to the banner, I hung some pom poms that I made!! I followed an easy tutorial from
here.

The only thing I did differently as use clear jewelry string/fishing wire type stuff from the craft store instead of the floral wire and it worked! The floral wire may work better, but what I used did the trick so I was happy! I was really surprised by how quick and easy this project was!
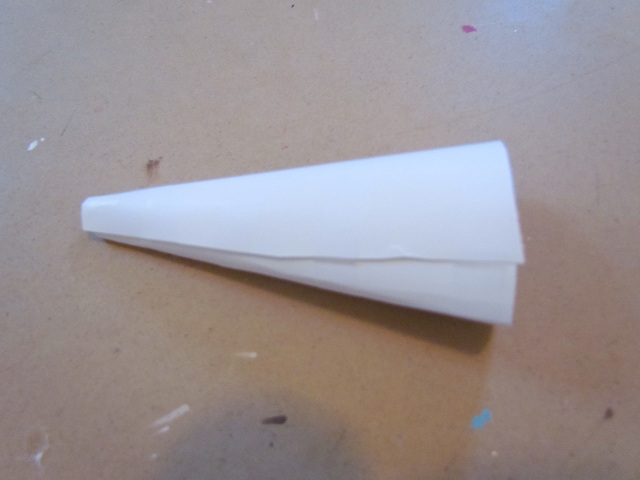
I ordered some Elmo cake pops and displayed them in a ribbon covered cone!

All I did was take some thick red ribbon I had on hand and wrapped it around the cone as tight as I could while leaving a tiny space to stick the cake pop sticks. To cover the top I trimmed the ribbon into a small circle and pinned it down.

I got these cute favor bags from an Etsy shop you can find
here. I thought about making them, but didn't really want to spend the time. Also, they were reasonably priced and the shop had great reviews!
In keeping with the Elmo theme, the favor bags were full of sesame street coloring books, a small pack of crayons, a small carton of gold fish, and a Cookie monster or Elmo cookie! The coloring books and crayons were from the party store in packs of 12, the goldfish from Target, and the cookies were from Sugar Shack Sweets just like the cake pops.

Here's a shot of the whole set-up...don't you just love the life size Elmo balloon, lol?!
Next, I would like to share the Elmo cake!!!
Confession: I did not do any of the baking, white icing, or polka dots (Publix did). However, I can take all the credit for the Elmo!!!! And I'm super proud of how it turned out! Honestly, I was very nervous while doing the Elmo head because I had not practiced and it was my first time working with fondant. But I'm happy to say all turned out well! Whatcha think?


A cake bakin' friend gave me some good tips:
She told me to get a small batch of white fondant. I bought some for around $4 with coupon at a craft store and also some orange and black colors to tint the icing/fondant. It comes in a big block and you basically tear off however much you need, roll and kneed it, and add the tint color a little at a time with a toothpick. Then roll it out with a rolling pin to get it pretty flat. I used random kitchen objects to make my shapes. I used a shot glass for the white part of the eyes, a teaspoon for the black part, a regular spoon for the nose, and I free-handed the mouth. I used a butter knife to do all my cutting and touching up! I also used food safe latex gloves so I wouldn't get coloring all over my hands. Also, I watched a video on making fondant on you tube that helped a lot!
Icing:
For Elmo's red, furry head I bought a tube of red icing. My friend told me to get a Wilton French icing tip and poke at it for the furry effect. And this technique worked great!
So, what do you think? Have you done an Elmo birthday party before? What party themes have you done or will be doing soon??